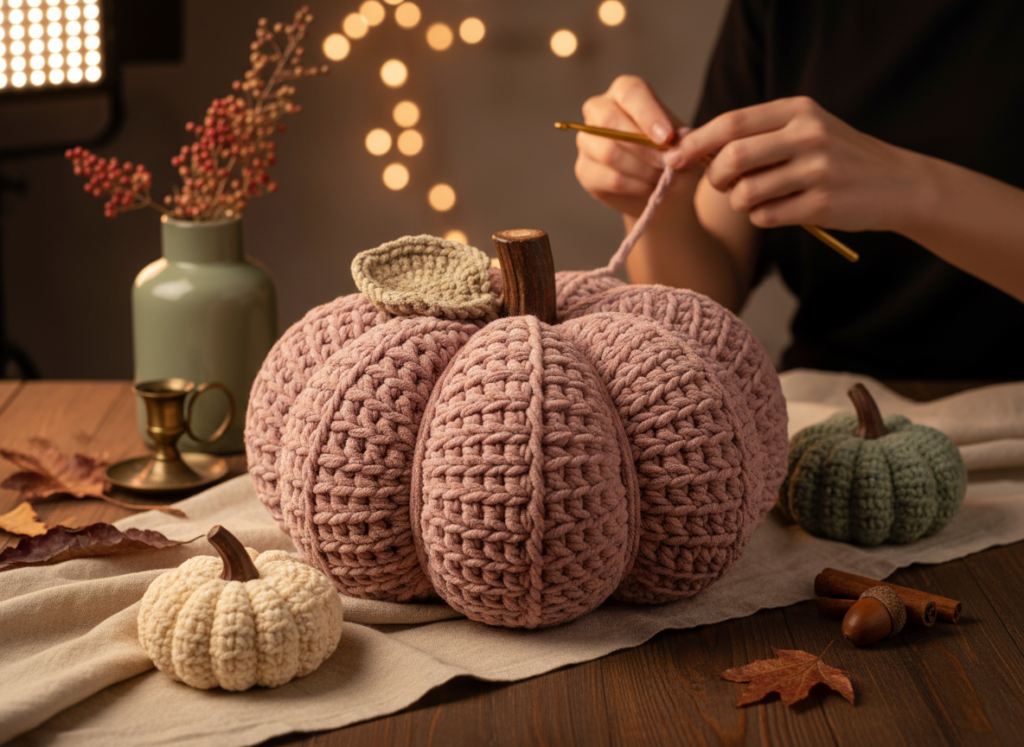
Prepare to be amazed! What if I told you that a long, narrow strip of crochet fabric, looking like nothing more than a simple belt or scarf, could transform into a luxurious, generously sized dusty-rose-mauve pumpkin? This isn’t magic, it’s the beauty of clever crochet construction, and in this post, I’m going to guide you through every step of making your own.
Imagine a cozy autumn evening, a warm drink in hand, and this stunning crochet pumpkin gracing your coffee table. Its soft, tactile texture and sophisticated dusty rose hue make it the perfect centerpiece for your fall decor. This project is not just about making a pumpkin; it’s about experiencing the satisfying journey of watching a flat piece of yarn become a beautifully sculpted, three-dimensional object. The finished pumpkin is wonderfully squishy, with deep, inviting ridges that beg to be touched, making it a perfect gift or a statement piece for your own home.
This pattern is designed to be accessible yet incredibly rewarding, teaching you how to manipulate simple stitches to achieve a truly impressive result. The chunky yarn creates a plush, substantial feel, while the subtle variations in the rose-mauve color add depth and elegance. Whether you’re looking to add a touch of autumnal charm to your space, create a unique handmade gift, or simply indulge in a satisfying craft project, this dusty rose crochet pumpkin is an absolute delight to make and display.
Pattern Info
- Skill Level: Easy
- Finished Size: Approximately 32-38 cm (12.5-15 inches) wide and 22-25 cm (8.5-10 inches) tall (excluding stem).
- Gauge: 7 hdc BLO stitches and 5 rows = 5 cm (2 inches) using a 6.0mm hook. Please note that gauge is not critical for this project, but consistent tension will ensure a beautiful result.
- Abbreviations Used:
- sc = single crochet
- hdc = half double crochet
- ch = chain
- sl st = slip stitch
- BLO = back loop only
- st(s) = stitch(es)
- rnd = round
Materials
- Yarn:
- Super Bulky (Weight 6) yarn in Dusty Rose Mauve: Approximately 300-350 yards (275-320 meters). I recommend a soft acrylic or wool blend for the best texture and drape.
- Small amount of Super Bulky (Weight 6) yarn in Champagne Gold for the leaf.
- Hook: 6.0mm (US J/10) crochet hook
- Notions:
- Polyester fiberfill for stuffing (approximately 200-250 grams)
- Large eye tapestry needle
- Stitch marker (optional, but helpful for keeping track of rows)
- Natural dark-brown wooden stem (approx. 7-9 cm / 3-3.5 inches long)
- Hot glue gun (optional, for securing the leaf if preferred over sewing)
Pattern Overview
The magic of this dusty rose crochet pumpkin begins with a deceptively simple foundation: a long, narrow strip worked flat in rows of half double crochet in the back loop only. This technique creates beautiful, prominent horizontal ribs along the strip. The construction process then takes this flat piece and transforms it into a three-dimensional marvel. First, the short ends of the strip are seamed together to form an open-ended tube. One end is then gathered tightly, and the tube is generously stuffed with fiberfill, which expands the ribbed fabric and starts to create the pumpkin’s characteristic roundness. The top opening is then gathered and secured, and here’s where the real sculpting begins: a strong strand of yarn is threaded through the pumpkin, vertically compressing the stuffed body at multiple points to create those iconic deep ridges, giving the dusty rose pumpkin its final, beautifully sculpted form. Finally, a natural wooden stem and a small, delicate champagne-gold crochet leaf are added to complete your stunning autumn centerpiece. It’s a truly satisfying process that builds shape and character with each step, culminating in a luxurious and inviting handmade pumpkin.
Ready to embark on this enchanting crochet journey? Let’s turn a simple strip of yarn into a magnificent dusty rose crochet pumpkin!
Step 1: Crochet the Ribbed Strip
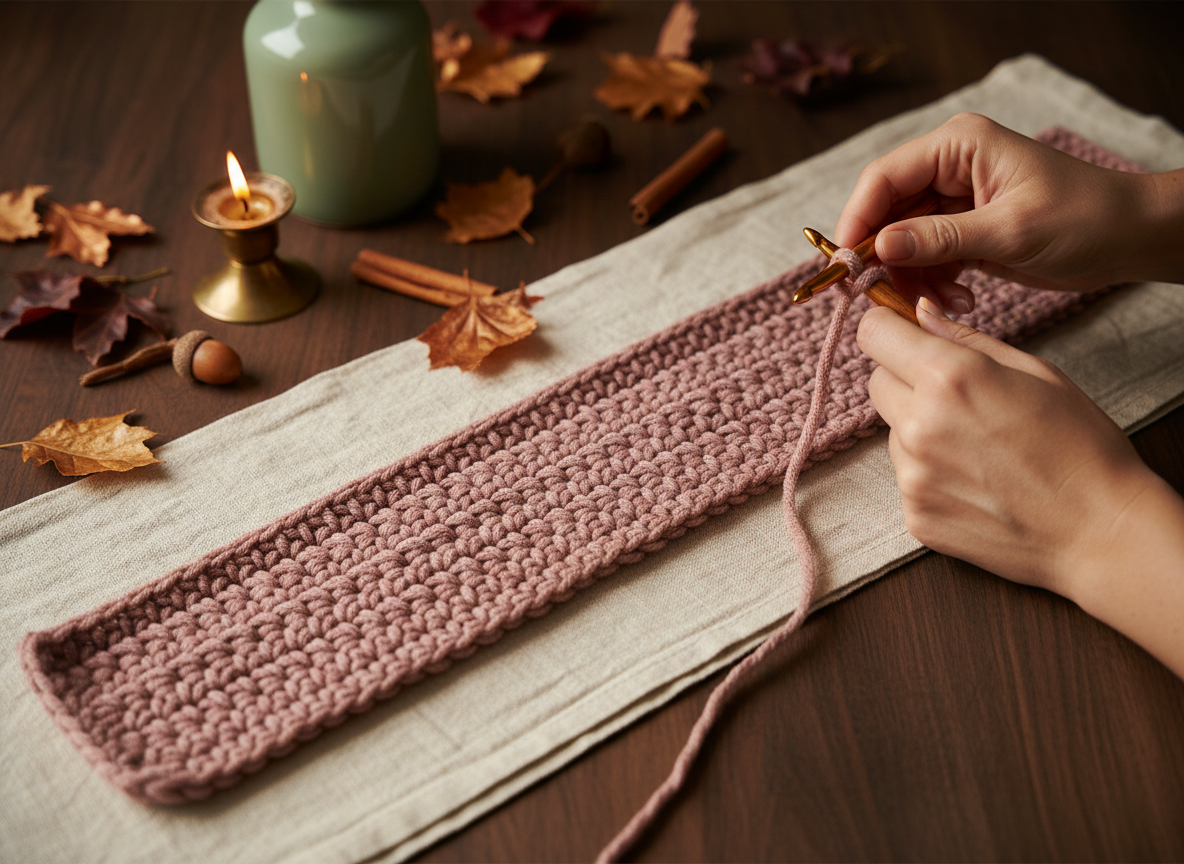
Using dusty rose mauve yarn and a 6.0mm crochet hook, chain 46.
Row 1: Hdc in the 3rd chain from the hook and in each chain across. (44 hdc)
Row 2: Ch 2 (counts as 1st hdc), turn, hdc in the back loop only (BLO) of each stitch across. (44 hdc)
Repeat Row 2 for 70 more rows, or until the strip measures approximately 100 cm in length. The strip should be about 20-22 cm wide. Fasten off, leaving a long tail for seaming.
Step 2: Form the Tube
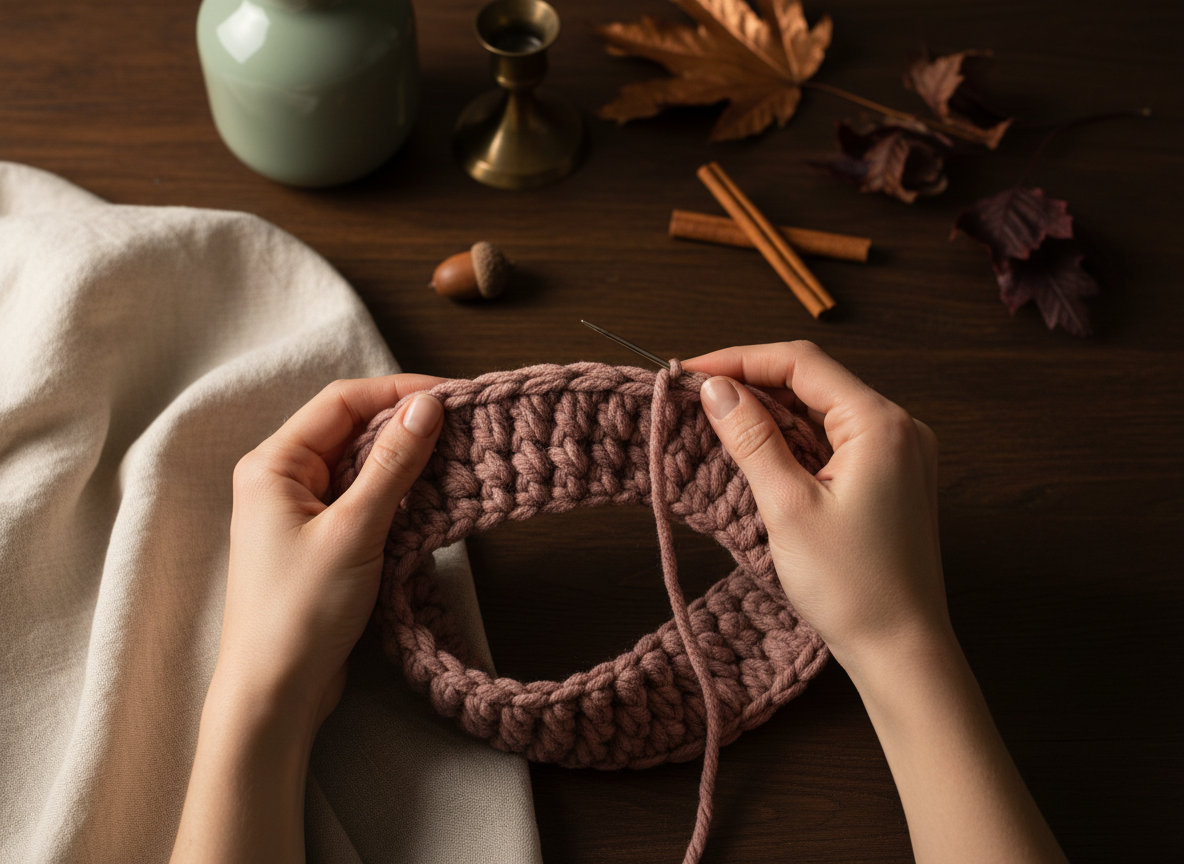
Bring the two short ends of the crocheted strip together, aligning the rows perfectly. Using the long tail left from Step 1 and a tapestry needle, whip stitch or mattress stitch the short ends together securely to form a tube. Ensure the seam is neat and as invisible as possible. Do not fasten off the yarn, as it will be used for gathering.
Step 3: Gather and Stuff the Pumpkin Body
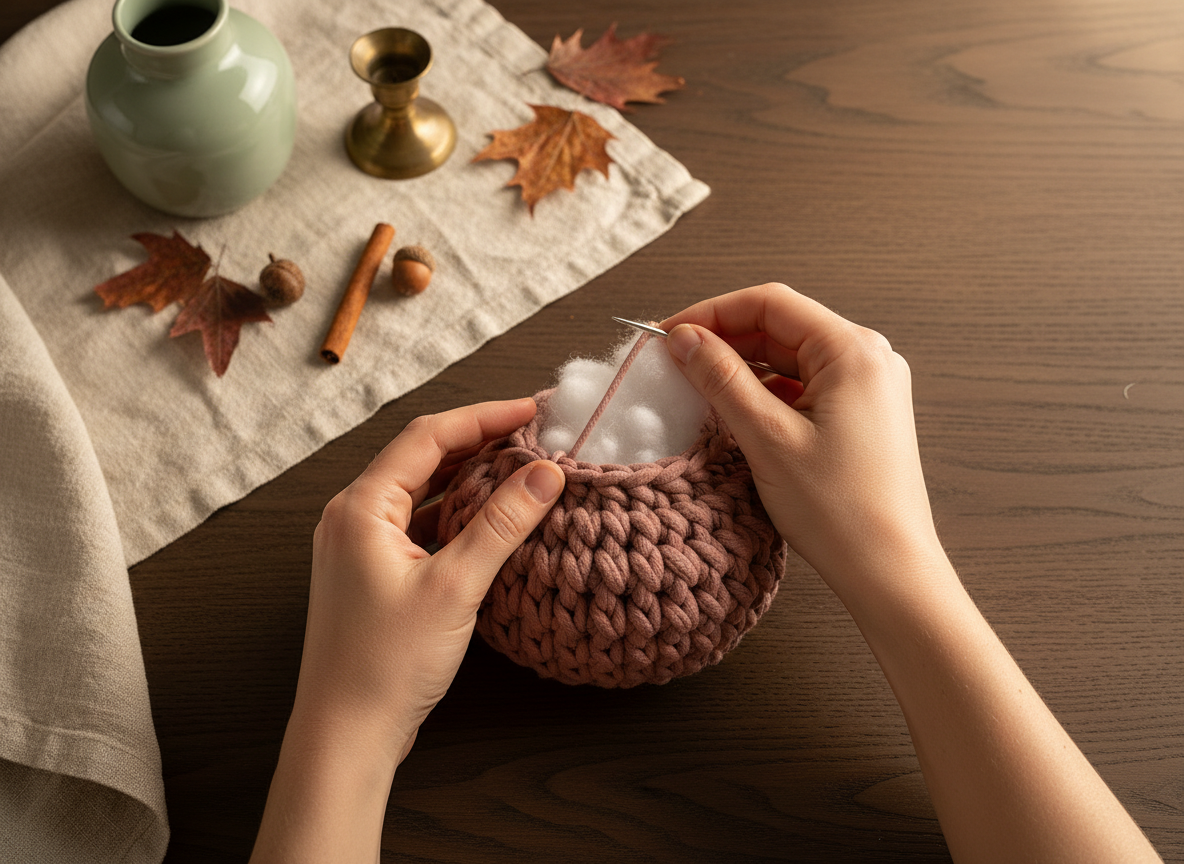
With the yarn tail still attached from Step 2, thread the tapestry needle around one open edge of the tube, weaving through the top of each stitch. Gently pull the yarn to gather the opening tightly. Secure with a knot, leaving a long tail. Turn the tube so the gathered end is at the bottom. Begin stuffing the tube generously with polyester fiberfill, pushing it firmly to expand the ribbed fabric and create a rounded shape. Do not close the top opening yet.
Step 4: Close the Top and Shape the Ridges
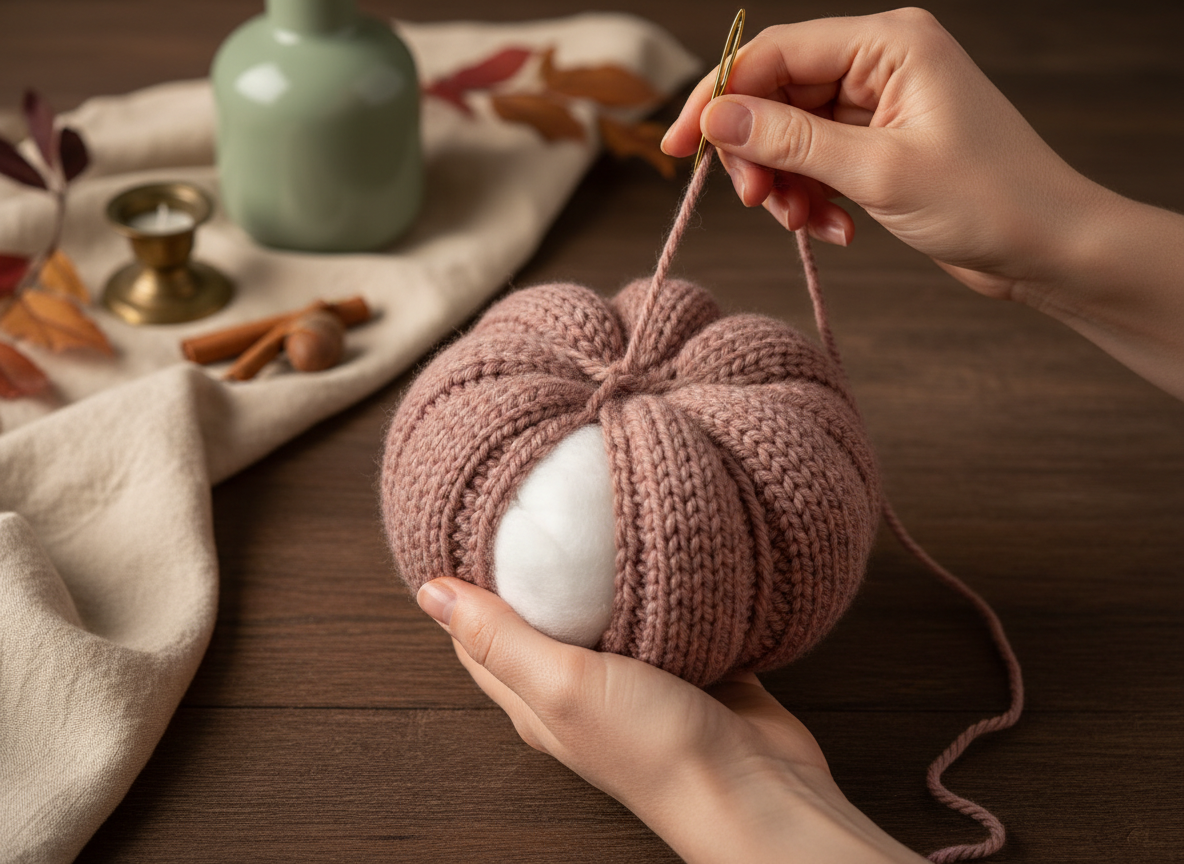
Once the pumpkin is stuffed to your desired firmness, thread a new long piece of dusty rose mauve yarn (approximately 100-120cm) onto your tapestry needle. Weave it around the remaining open edge of the pumpkin, pulling to gather it completely. Secure with a knot. To create the pumpkin ridges, insert the needle through the center of the top, push it all the way through the stuffed body to the center of the bottom. Bring the needle back up around the outside of the pumpkin, passing over the first ridge line you wish to create. Pull firmly to compress the body and create a deep groove. Repeat this process, creating 5-6 evenly spaced ridges around the pumpkin. Secure the yarn ends within the pumpkin.
Step 5: Attach Stem and Leaf
Once all ridges are formed and secured, gently press the top and bottom of the pumpkin to further enhance its squat, rounded shape. Insert the natural dark-brown wooden stem into the center top of the pumpkin. Using champagne gold yarn, crochet a small leaf (e.g., chain 8, sl st in 2nd ch from hook, sc in next, hdc in next, dc in next 2, hdc in next, sc in last, ch 1, turn, repeat on other side of chain, sl st to join). Securely sew or glue the finished champagne-gold crochet leaf next to the wooden stem. Weave in any remaining loose ends.
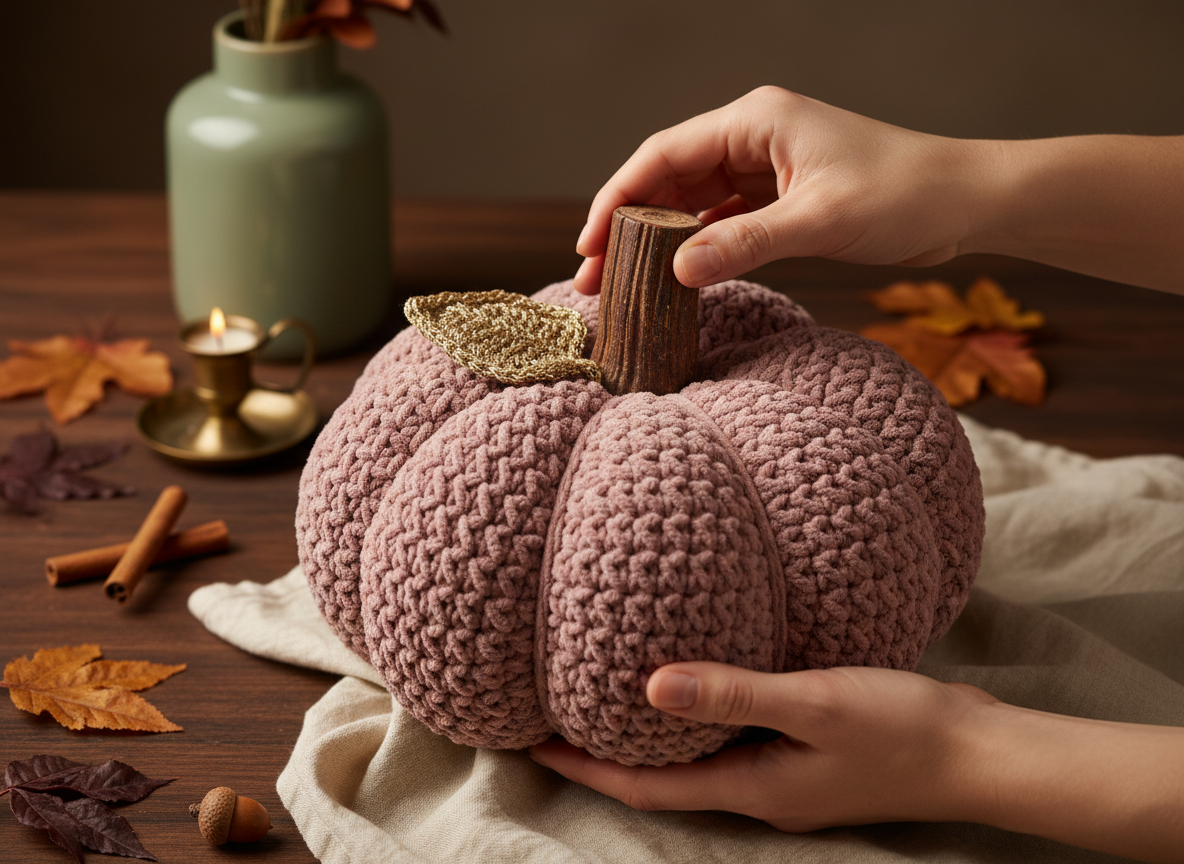
And there you have it – your very own luxurious dusty rose crochet pumpkin, transformed from a humble strip into a stunning, squishy centerpiece! Isn’t it incredible how a few simple stitches and a bit of clever shaping can create something so visually impactful and tactilely satisfying? The deep, plush ridges and the sophisticated dusty rose hue truly make this pumpkin stand out.
This large crochet pumpkin isn’t just a decorative item; it’s a conversation starter. Imagine it nestled on a dark wooden console table, surrounded by a few flickering candles and some dried autumn botanicals, instantly elevating your fall decor. It also makes an exquisite handmade gift for a loved one, a unique housewarming present, or a charming addition to a baby nursery. You could even make a few in varying shades of rose, ivory, and sage green to create a beautiful coordinated display, just like the companion pumpkins you saw in the video!
The beauty of this project lies in its simplicity and the dramatic transformation it undergoes. Once you master this technique, you’ll find yourself looking at crochet fabric in a whole new light. Don’t forget to watch the full video tutorial for a complete visual walkthrough of each step. Seeing the strip curve into a tube, the stuffing expand the body, and those satisfying pulls create the ridges really brings the process to life. I love seeing your finished creations, so please share your dusty rose crochet pumpkin on social media and tag me! I can’t wait to see your unique take on this beautiful autumn project. Happy crocheting!